Tuesday, April 22, 2014

A New Beginning

Years ago, I bought some white, and black tulips. I had them in the back yard for awhile, then moved them out front. They've been struggling to come up and bloom amongst the grass and weeds for many years. I used to have daisys and gloriosas all along the front of the house, but somehow it got away from me. The daisys and gloriosas are long gone, but the tulips just keep trying! I've started watering out front this year, and they really have thrived in it! Although they're still surrounded by this tough old desert grass, they are more beautiful than ever! I'm going to dig them up this fall, so we can put in a raised flower bed, then replant them spaced out a bit, hoping they reproduce so I can fill the raised bed with them in a few years.

This is the newest flower bed. It is on the north end of the house where it never truly sees direct sunlight, so I planted some sweet woodruff here. I love this plant! The flowers are in small clusters, but they smell like gardenias to me. I also put a peony at the far end there, where it will get sun till about 2PM everyday.
This wheel barrow has been on this property longer than I have. It was here when we moved in, and I used it for a few years, before I decided I wanted a deeper one. It sat out back for a long time, and someone must have backed into it, because its bent at an odd angle, and the front tire finally went flat. I've walked past it everyday, two or three times a day for several years (at least ten). A couple weeks ago, it spoke to me. It said "I'm tired of sitting here rusting in the sun. Fill me with flowers and pull me around front, I'll be much happier there."
So I did.

It has several kinds of flowers in it, some short, some tall, some are ground cover, some creeping.... well the lobilia froze a few days ago and I had to dig it up, but I'll put more in it next week. I've since moved it more to the left of where it sits in this picture, because our prevailing winds come from the North and West, the flowers were getting beat up sitting there.
I just got these pansys to put in it yesterday, and the velvety purple ones in the picture below.
I think the wheelbarrow is much happier now. And so am I.

Monday, April 21, 2014

Pea Tree!

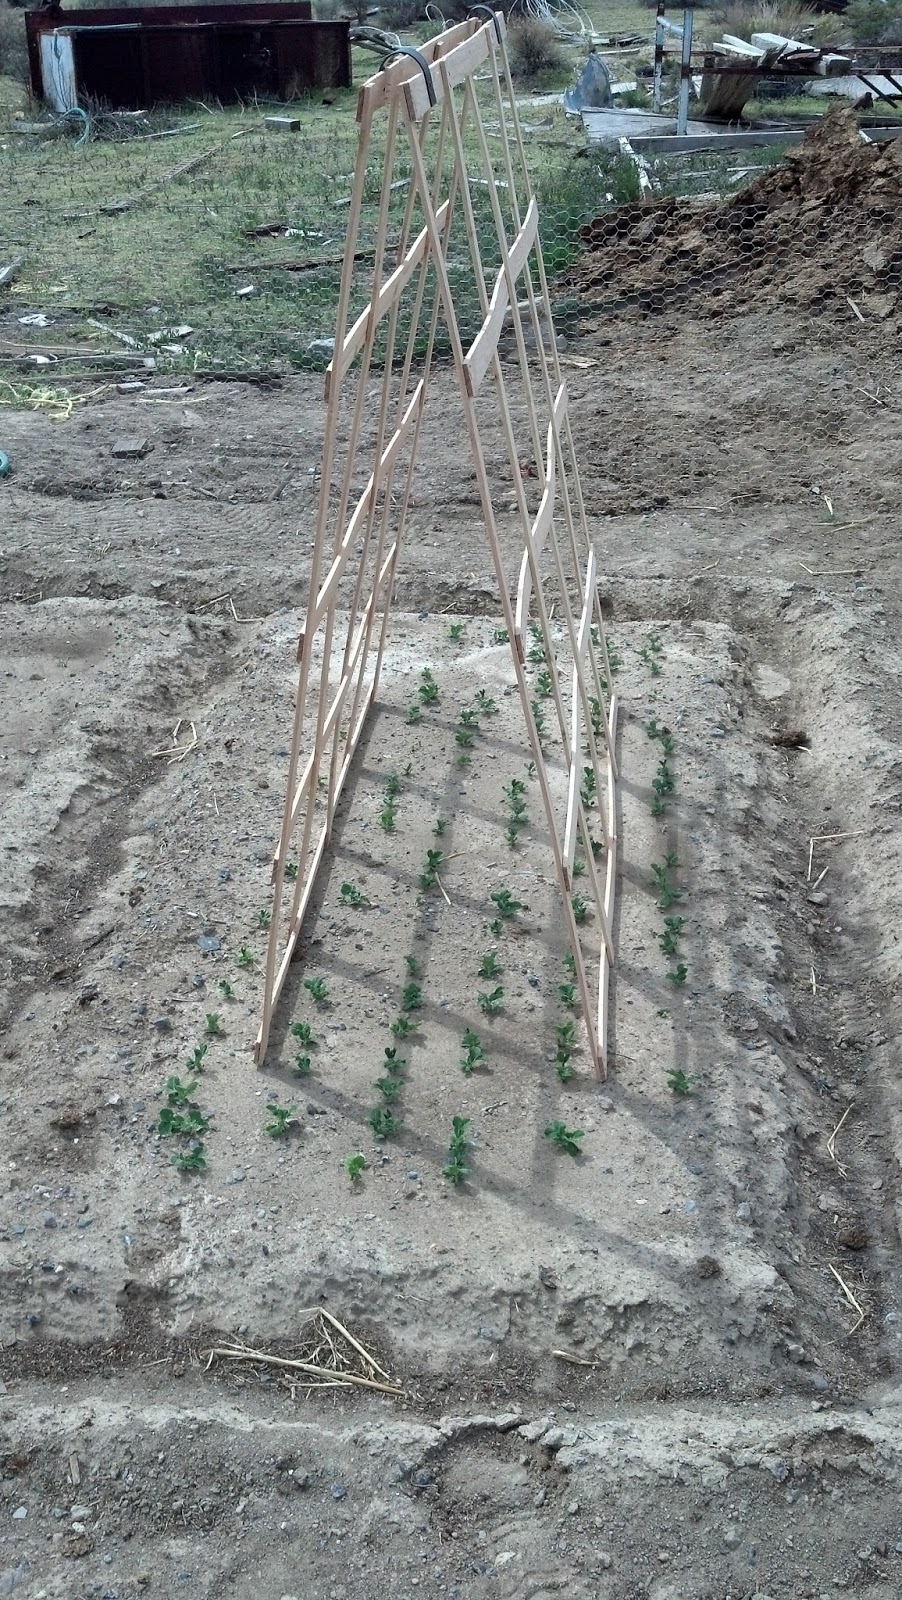
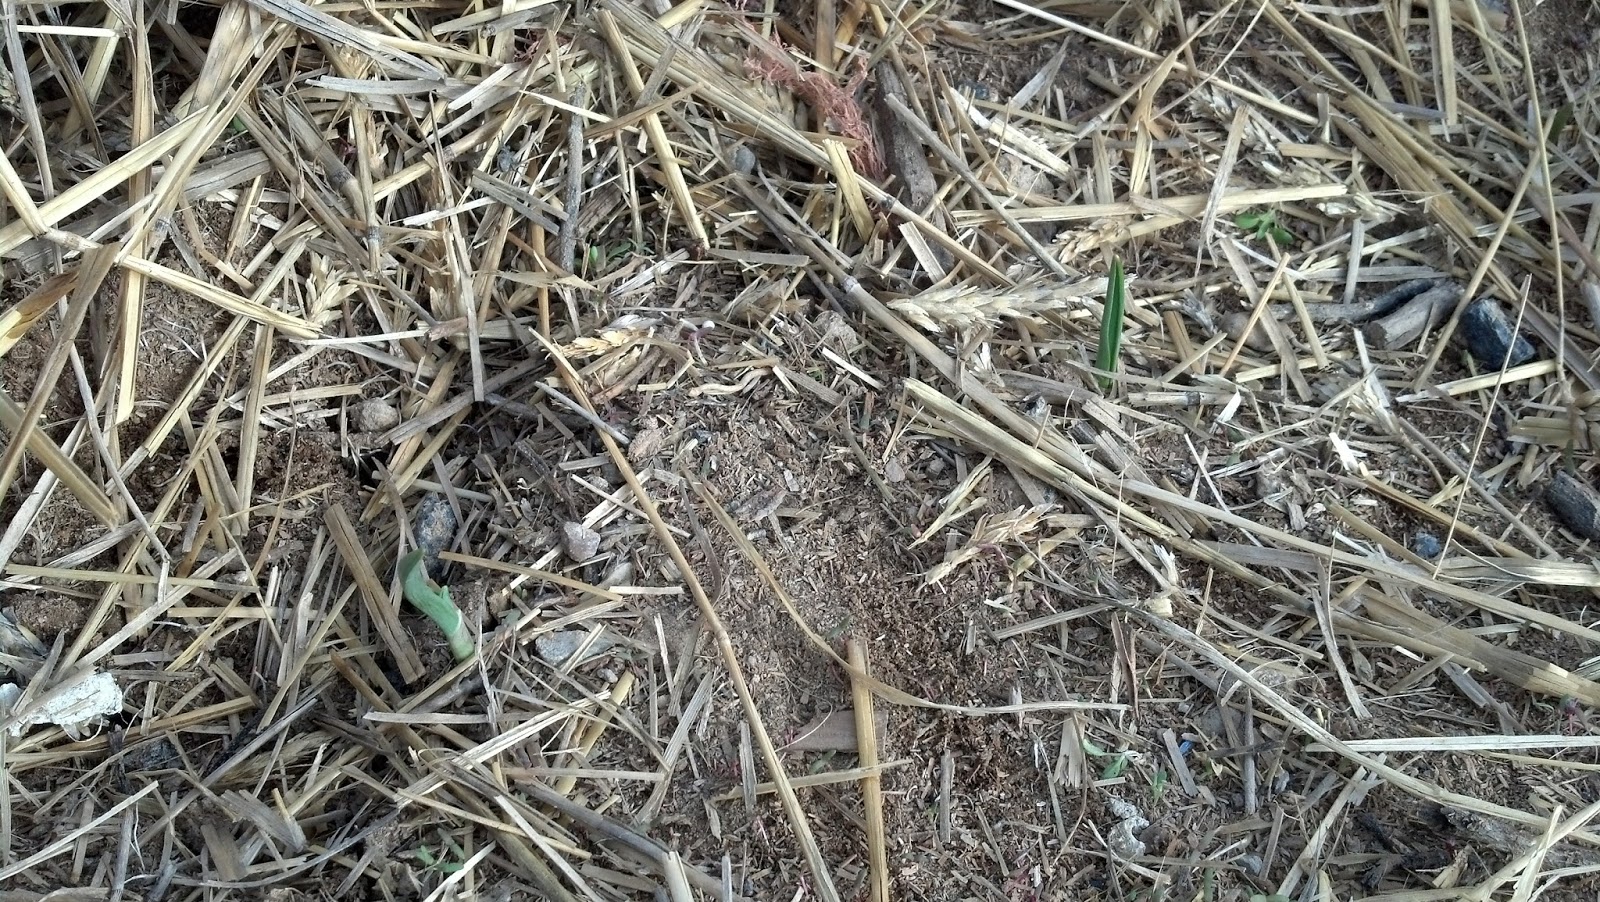
I planted peas! I haven't been in a garden with peas in it since I was a kid! My Mom still swears not one pea made it into the house! We would stand in the garden and eat them right out of the pod! I'm going to try to get some of them into the house to can this time round, but no guarantees!

You read so many things on line about how best to do something, it's really hard to decide what is right for you! For instance, one blog I read, suggests that you just kind of toss the seeds out into a square plot, and let the pea plants grow together and they kind of support themselves, without the need of a trellis. This kind of made sense to me, but at the same time, how would you get to the pea pods on the central plants? Then I saw the plans for a home made trellis, cost is less than $15, total! I decided to make it, and blog about it. As in most things I do, I've done it my way, so it's slightly different from the original plans I read about here.


Things you'll need:
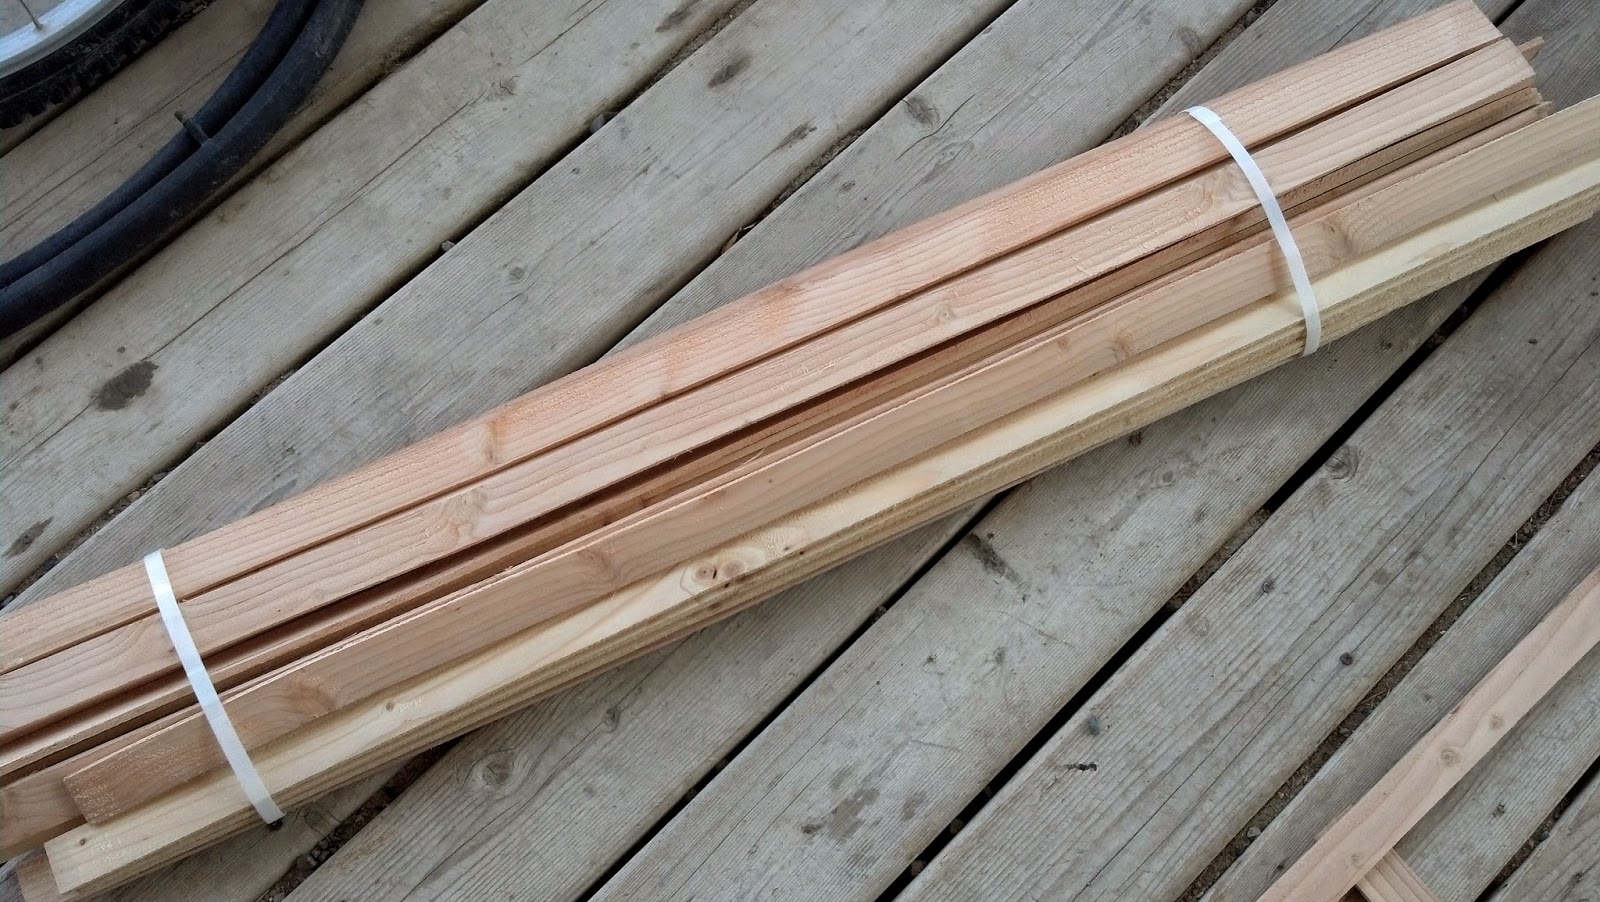
Slats, hammer, combination pliers (for pulling half buried staples), staple gun, 1/2" staples (I used T-150), measuring tape, marker, 4 to 5" strips of hard flexible plastic, or strips of rubber.

I got my slats from Home Depot, talked to three people before one of them didn't ask me if I wanted survey stakes and actually knew what I was looking for :)
These are 4 feet long, by one inch wide. They're only about a quarter of an inch thick. They're thin enough that they are slightly flexible, and remember, this is pretty much throw away wood, there will be knots, and they aren't going to be totally straight. I don't think this will last much more than one growing season in northern Nevada. Between the wind. the sun and the constant wet/dry conditions , I will be really surprised if it lasts much past harvest.
I laid out 4 slats... The large elephant (hole) in the porch is a constant reminder that my kids almost burned my house down. Long story. Moving on.

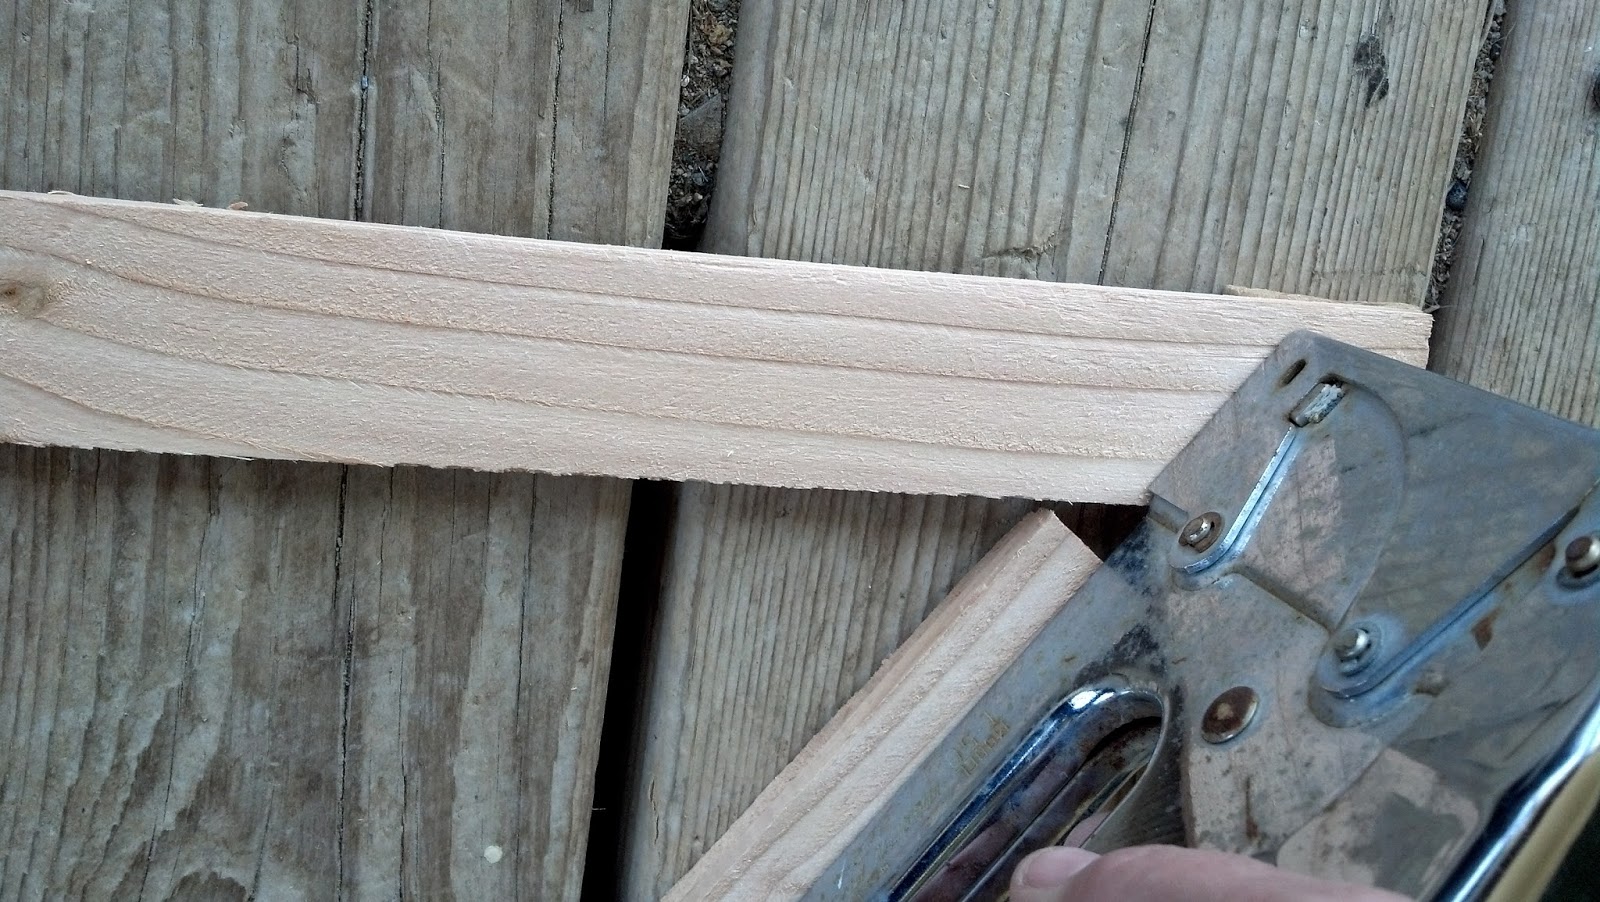
I over laid all the corners, then double checked to be sure they were all as close to square as I could get them and stapled them together. With this heavy duty stapler, I had to put two slats under the back end of it so it would sit even with the ones I was stapling, otherwise, the staples didn't go in enough for me to hammer on home. Another person may have had enough arm strength to do this without a crutch, but personally, I appreciated it :)
I placed two staples per corner, and then tap-hammered them to make sure they were flush on the wood.


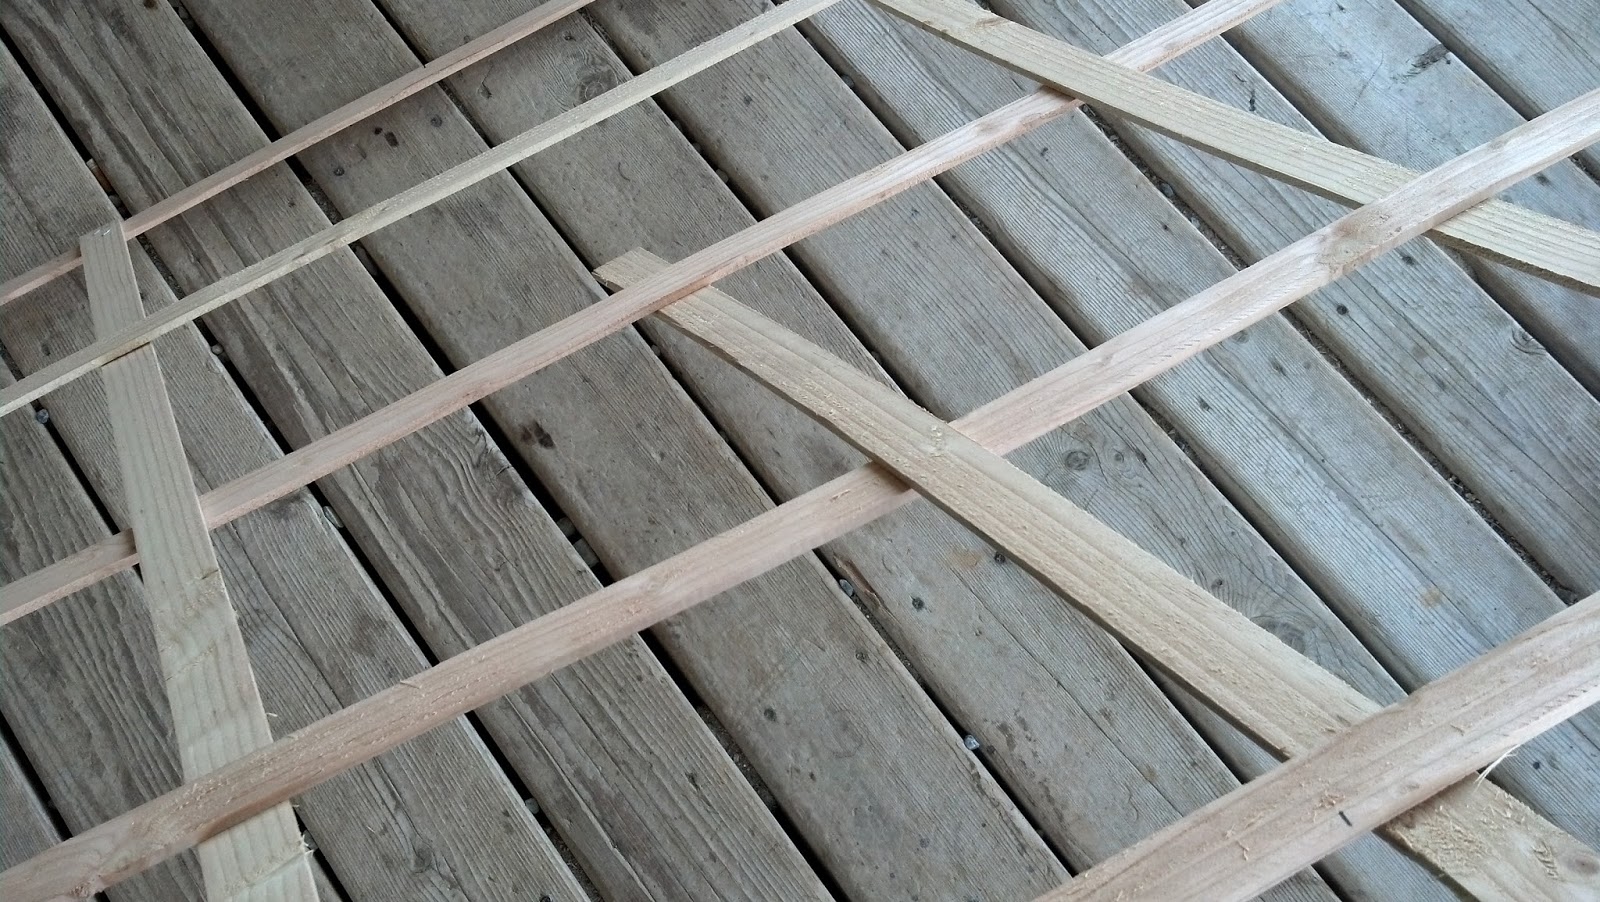
Then I took my measuring tape and marked out each foot, three marks total, top and bottom.


Take three slats and lay them at the marks, double check to be sure they are straight, then put two staples in each end of each slat.
Mark out each foot on the sides to place the cross slats. These I wove through the other three. I started with the two on the outside, these will be woven in the same way; under, over, under, with each end of the slat on top of the frame. Staple down.
The middle slat will creak a bit  when you put it in, as the cross slats are tighter now with the other two slats in place. This one will go over, under, over, with each end of the slat under the frame. Double check your marks then staple.


Click for big to see the weave better.

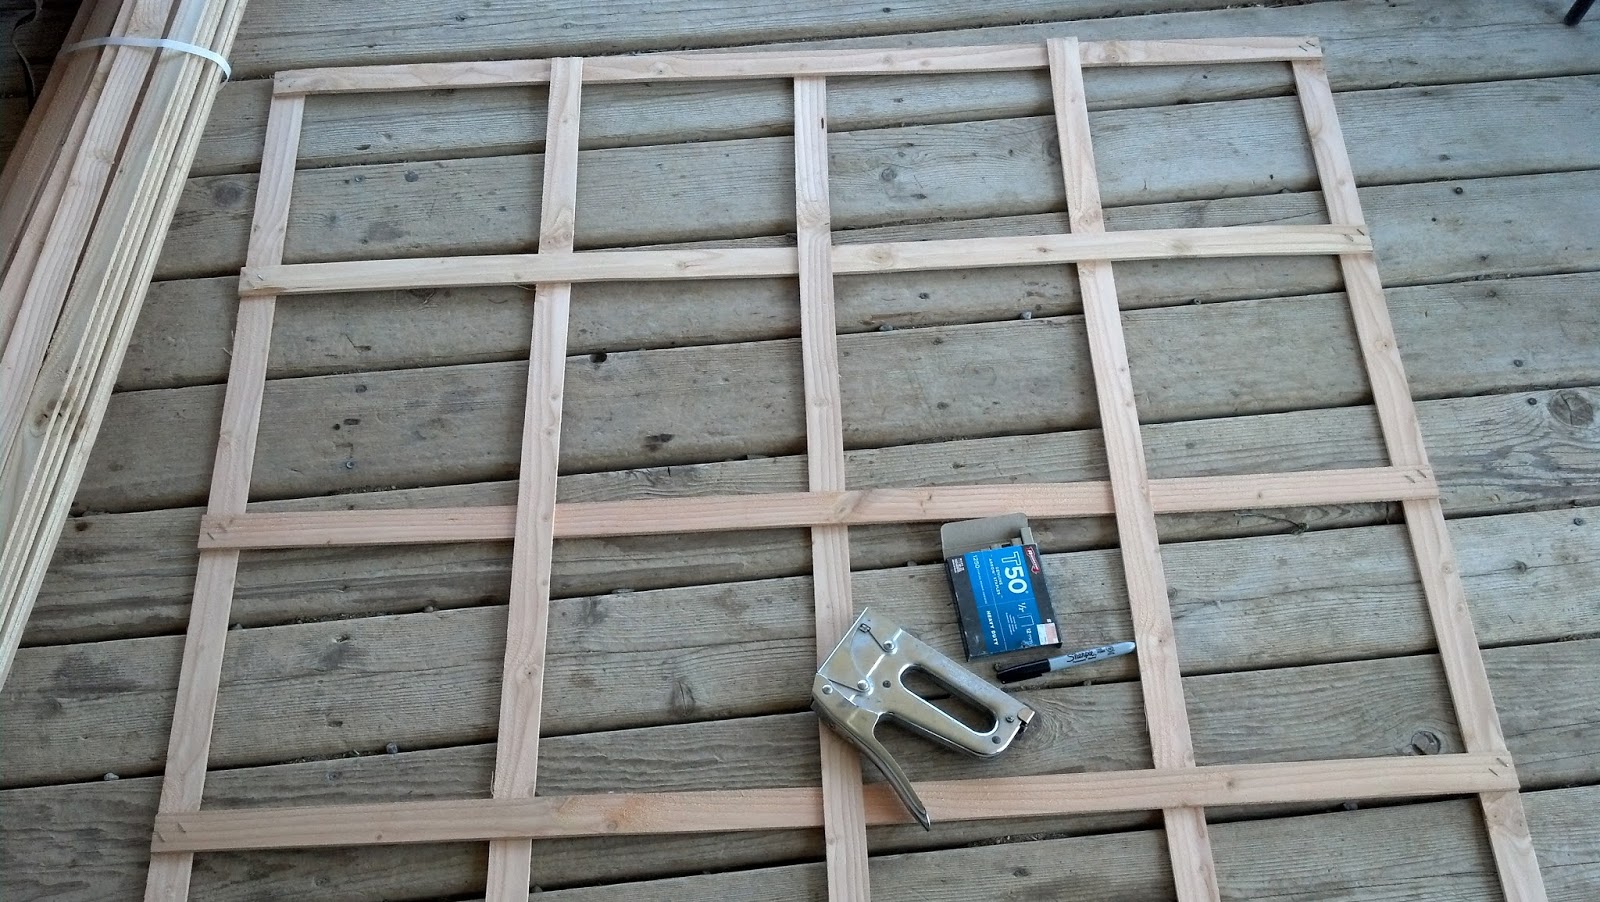
One side of the trellis down, one to go!
And... repeat!
And now there are two!
Let's put them together...

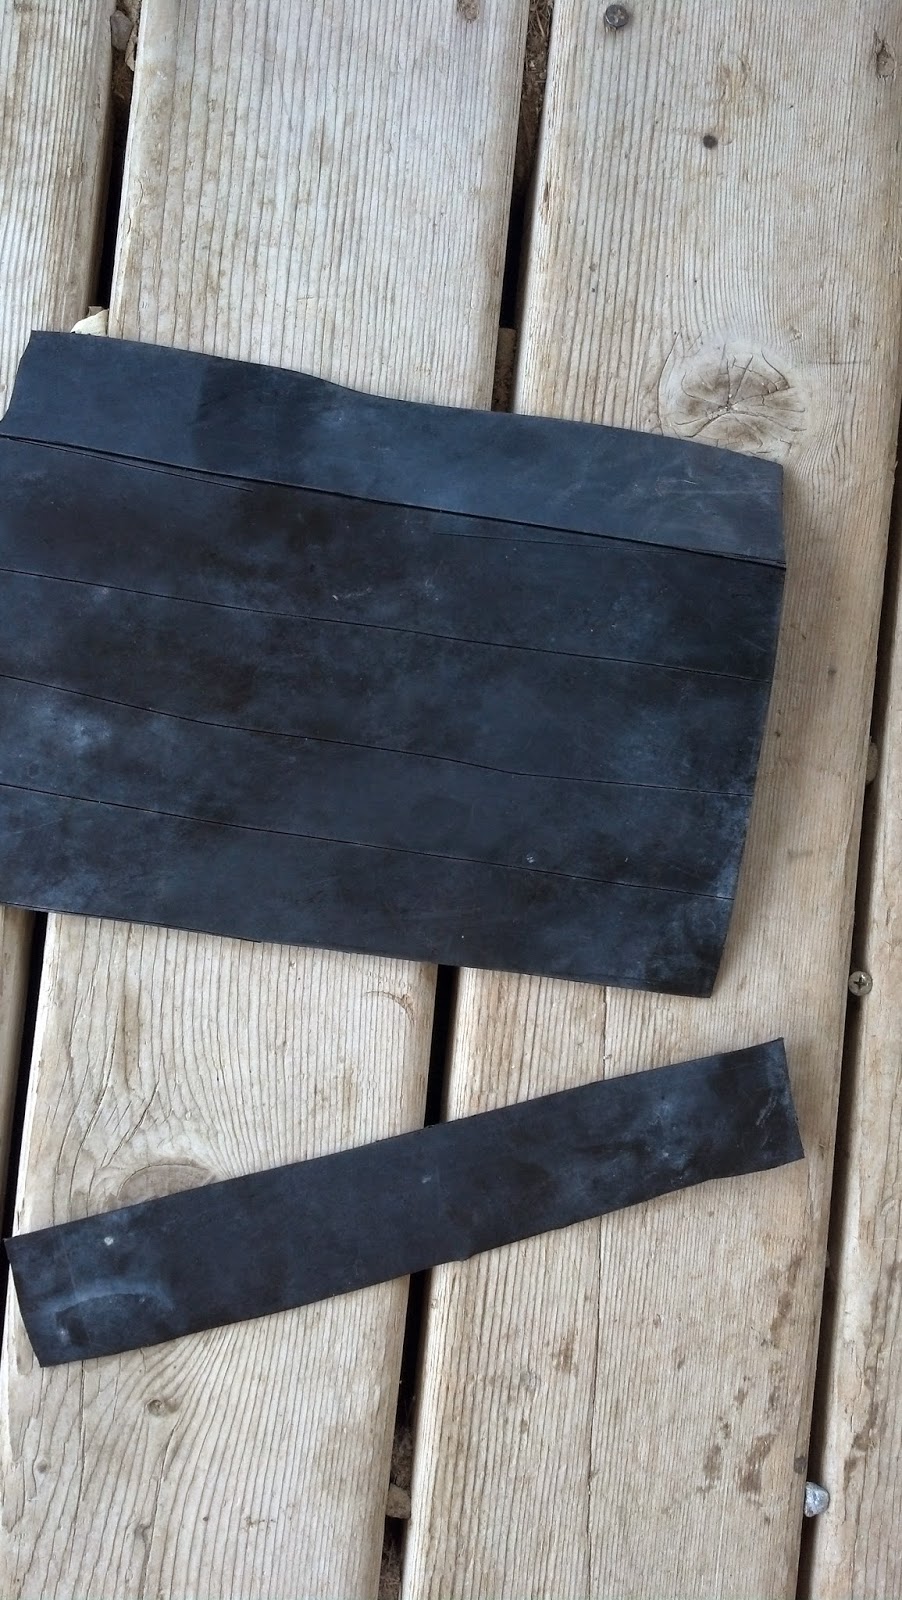
This is a bit of black plastic that is used to line leach pads. It is thick, heavy and flexible. I cut the block out of a huge sheet I've been mining from (pun!) over the years for various purposes. I'm going to make more of these trellises so I cut a few strips. These are about 10" long, and I cut them in half. They are just a little long, so strips anywhere from 4 to 5 inches should work fine.
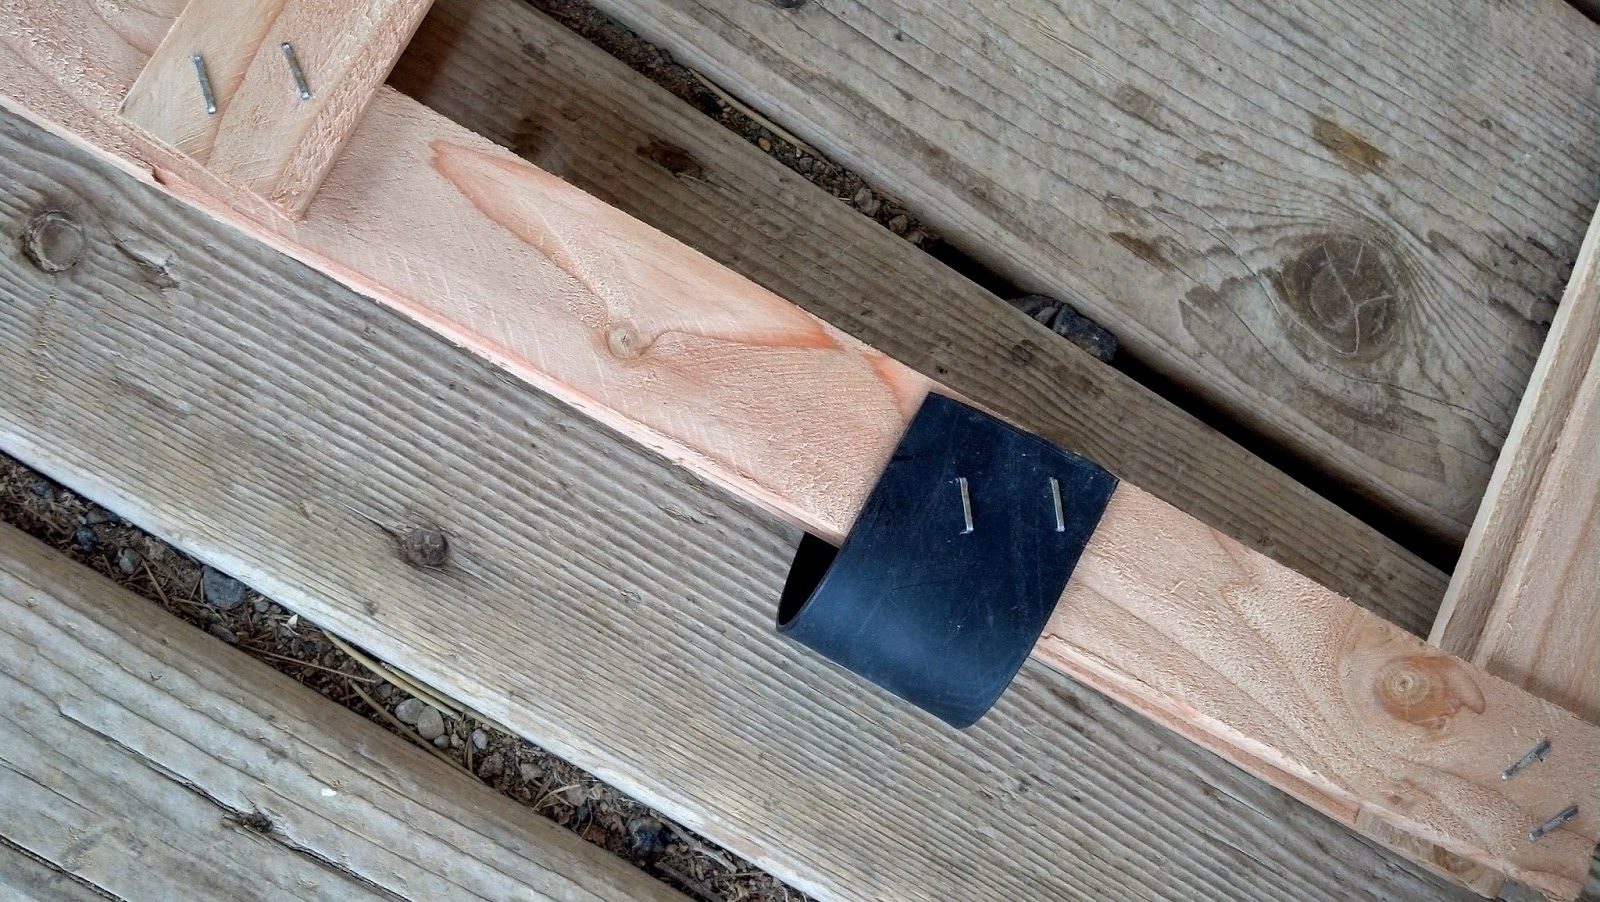
Put your two trellises together, and decide where you want to place your plastic or rubber strips. I place them between the frame and the first slat to either side, just because there weren't any staples there already. I put the bottom slat of my staple crutch between the two trellis frames, then stapled. And guess what? I stapled them together!! Thank goodness the staples come out without too much trouble!

Get both strips in place on once side, and flip! Bend the strip up over the outside of the frame, and staple in place.
Viola!

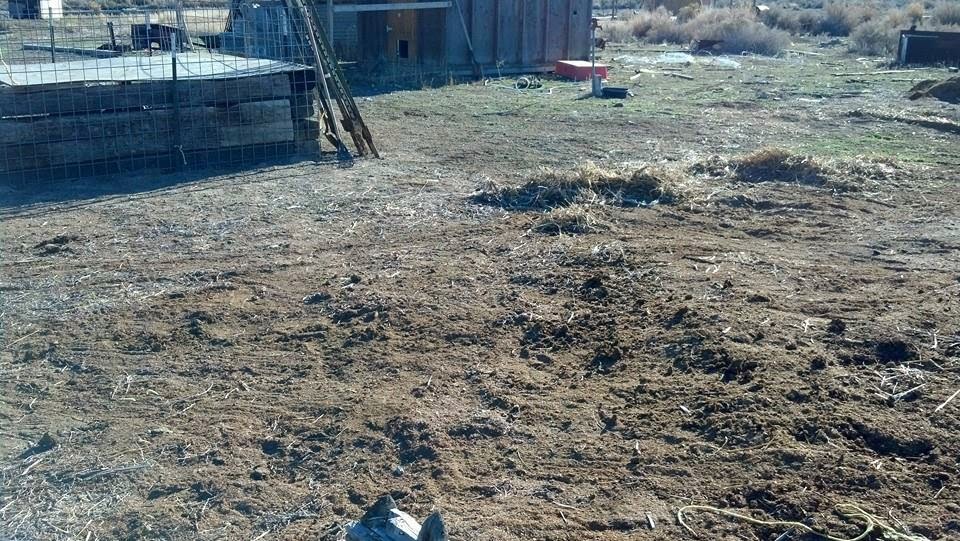
Now all that is left, is to find something to anchor it down in the garden.
I believe it's going to have to be a T-post, as it will need to be anchored at the top to keep the wind from whipping it about.
I might put two in there, and put them cross ways of how it is in this picture, mainly because this pea bed is in the south side of my garden, and anything to the north of that trellis will be in shade. If I put two in, and turn them crossways, at least some sun will get through.

Happy Gardening!


Sunday, April 13, 2014

Home Grown Chicken Roost

Okay, it's not quite the Hilton, but my chickens love it!

I built this roost a couple years ago, and I am quite proud of the results!
I'm not a wood worker, or a carpenter. Just a chicken owner who did something right! I referenced Building Chicken Coops: Storey Country Wisdom Bulletin A-224 for measurements. 
My chicken coop isn't very big. It is actually a re-purposed storage shed.  It's about 12 ft by 8 ft, with a completely wired in and roofed yard of about 8 by 8. Red tail hawks are prevalent in this area, and I'm sure they would love to add chicken to their diet.
Don't mind the holes in the back side of the shed, I raised two boys and a tom girl, they had bows, and that side of the shed faces away from the house...
I will eventually replace the ply wood, but for now I figure it offers some ventilation.
To make the roost you will need;

5 - 1 x 1 x 8
3 - 4 x 4 x 8
18 - 2" Nails
Planer
Hand saw

I took the planer and shaved off two edges of the 1 x 1s to give the birds a gentle curve to nestle on. I left these at full length because they fit well inside the coop.
The 1 x 1s are completely rounded on the top side, flat on the bottom.
I then marked where each 1 x 1 cut out would go, at 17" apart and notched them at an angle so the 1 x 1s would sit flat when the roost was laid against the wall. I couldn't tell you the angles, I am pretty sure I just got lucky in that everything fit and was level when it was done.

I put this together before I put it in the coop, but you can do it either way, I'm sure. 
I took two 1 x 1, and marked where the 2 x 4s needed to be placed, then nailed one in the top notch, the other at the bottom, then nailed the other three in place.
After I got it in the coop, I put nails at the foot of all three 4 x 4s, to keep it from sliding out. I didn't nail it down to the floor, so that I can move it when I need to clean up under it. It is not attached at the top.

Although at this time, I only have 7 birds, in the future when I decide to expand, I will have enough roost room for about 40 birds.

Thursday, March 20, 2014

Of Beans and Garlic!

I discovered something yesterday.
A few weeks ago, I dried some turmeric on my leather trays, and it stained them. A couple weeks ago, I dried some garlic on the leather trays, and they still smelled like garlic. I didn't put two and two together, to come up with, if I put wet fruit on the leather trays, they would come out smelling like garlic, and tasting a bit like turmeric.
I imagine you guys are already ahead of me here. I wanted to make some fruit leather, so I did. It is really really good! Just a little garlicky... I figured it was a lesson learned, don't use the same leather trays for fruit as you do for garlic. I was cleaning them and thought to myself, I could put coconut oil on them to season them for the next time I want to use them. That's when I realized the stains were coming out from the turmeric, and it also took the garlic smell out! Yay for coconut oil!
Now I have three clean and shiny fruit leather trays, that don't smell like garlic!

I got this in the mail Tuesday!

I canned 15 pints and two quarts of pintos with bacon and onion, and two quarts of potatoes yesterday! I'm now out of pint jars, and still have a bunch of beans I want to do.
Two quarts of pintos, two of potatoes

 This is my apple scrap vinegar, I had to put it back into the container I had it in, because I need to get some plastic lids for the jars. When they come in, I'll be able to jar it up and it will be ready to use :)
 Dehydrating green onions
...
 Dehydrated fruits for Kevin. He's stationed in Afghanistan now, wont be home till August.
 My new toy!!!

Dried these last night, half eaten already. I have some fruit leather in the dehydrator now, hope it comes out better than the last :)

Drying chokecherry sauce

Rolled fruit leather
To the left is pear butter I made last year, and the right is rosehip 'jelly' that didn't quite jell. I've got two more trays of this going, it is very, very tasty! Bet it will be even better without the turmeric and garlic!

Monday, March 17, 2014

Spring!

I was going to write about my adventures in learning to can last fall, but I've got a surprise coming in a few days, and it will go right along with that.

I've decided, for the first time in a very long time, to plant a garden. Right now, it is nothing but dirt, horse poop, and some weeds. Oh, and a row of garlic that I'm hoping the rabbits will not be attracted to before I get it fenced. The garlic row is to the right in the picture...
 My chicken coop is at the top, and the pen to the top left is the pig pen (will hopefully have some pigs in it soon!)
Here is a close up of my garlic, from a few days ago, at the time I took the picture, there were only these two, now most of them are up, along about a ten foot row. Mimi from Desert Peach shared some of her crop with me, said it was wild garlic from up in Washington, off a reservation. Can't wait to see what it does!


On Thursday, I'm going to rent a tiller, and get this all tilled up, then we'll fence it with chicken wire. I have a HUGE population of rabbits here

If I didn't know better, I'd think I had a goose out there...
 
 My girls took a vacation, they've just gotten back into the swing of things in the last month. I was almost 3 months without my fresh eggs... although I did find an alternate supply :)

I think I might have been a little too anxious for spring; these are already getting their secondary leaves, I could be wading through zucchini vines before long. The tray on the left is all pickling cukes, the right tray is green zucchini, and yellow crookneck. The crookneck hasn't come up yet, not sure why.


.

Sunday, March 9, 2014

Fall Harvest

Have you ever harvested your own chokecherries? Or seen a wild elderberry tree, branches hung low with bunches of little powdery blue berries? Or fought your way through a wild rose bush thicket to get to the reddest, most plump rose hips? 
I had not, until last year, and oh, what I have been missing! 

Rather than retell the story, I will share what I already wrote! This is from another blog that I attempted to start last year. I didn't get much done on it, after the first few posts, I kind of ran out of steam. It was getting colder outside and we'd had about all the adventuring we were up for at the time :)

September 16, 2013
"A few weeks ago, my friend went out with her other half scouting for deer for her oldest son. She came back and told me that the chokecherries were almost ready to pick, that we should go check them in a couple of weeks or so. I agreed readily. I love going out into the mountains that surround our valley in the Great Basin, it is really gorgeous here. I’m actually kind of glad all anyone ever sees from I-80 is sage brush and dirt.
I have lived here for …well, a lot longer than I want to admit, to be honest, and I have never thought to look in these mountains for food! Why did I never think about the riches they offer!? I can’t answer that, other than to say I’m as complacent as most everyone else has become with the convenience of the grocery store. I am proud to say that this state of affairs is changing, and I’m learning how to live without all the creature comforts. I’m not sure what I’d do without my Kindle though…
Off we went, a couple of weeks later, buckets and bags in tow, to search out chokecherries. We found out that none of us truly knew what we were looking for, even though I’d Googled chokecherries the night before and kinda knew what they looked like. And she had thought she’d seen them before and declared them almost ready to harvest! We wandered up through one of the canyons on our four wheelers and found quite a few bushes with black berries on them, but we just weren’t sure what we were looking at. “Why are these berries so dry?”, “Guess we should have done this a couple of weeks ago”, “What are these berries?”, “Those are poison, #### told me so”. And so it went, until I saw a dangling group of dark berries that rang bells in my head and I said “THAT is a chokecherry tree!”
Yay! We found one! And then we found another, and another! We found so many, we got really picky about which ones we harvested!
We found out later, the first black berries we saw were service berries, edible, but the guy at the cooperative extension office had never heard of anyone that harvested them to eat. 
Elderberrys - beautiful

The ‘What are these berries?’ were elderberries; the ‘poison’ ones were (get this) rosehips. Who knew!? 

Juicing rosehips
And what are gooseberries? Yes, we found out what those are too. What a week we had! We gathered almost 5 gallons of chokecherries that first day, went back again for the elderberries and harvested about 2.5 gallons.
We went back later in the week and harvested more elderberries, and even more chokecherries. My daughter went with me on that trip, she climbed the trees to get to high bunches of elderberries, and we had my friends extendable pruner, were able to get another 2 gallons or so.


Gooseberries


I attempted to harvest goose berries but I did NOT have the right equipment! Those little buggers are painful! They should be called stickerberries, there are just as many sword-length stickers as there are berries! I was able to get some though, not sure what I’m going to do with them just yet. I already knew what currant berries were (not totally in a vacuum) and harvested some of those, but didn’t find many. I’ll probably throw them in with the rosehip jelly I’m going to make, and declare it jam. Sounds good!
Elderberry tree


That was my adventure, and I plan on having a lot more this year!
I'll share some of my at home adventures tomorrow; Canning!

Friday, March 7, 2014

Home Improvement!

Last year, DH decided to take a home improvement loan out of his 401K.
We've lived in this home for 16 years and have never done anything to it. I take the 5th on that point, cause I'll get myself in trouble if I start 'pointing' fingers.
It was in dire need of a paint job, a new roof, and a new furnace/AC.
When we bought our home, I insisted on a diesel furnace, he insisted on central air. We both got what we wanted, but something went wrong early on with the furnace; seems the little nozzle that sprays the diesel out to be ignited was not the right size, so every time it came on, it would burn way too hot, and eventually gutted the inside of the burner chamber (or whatever it was), till it just didn't work anymore. DH maintained all this time that if we'd 'just gone with propane' everything would have been fine. But, he doesn't pay the bills or deal with our debtors, and I flat our refuse to deal with a propane company. ANY propane company. And, the central air unit that he insisted on having, was woefully small for our over 2500 square foot interior, so it worked itself to death early on. For the past three or four years we've had a kerosene heater in the winter (which worked wonderfully, btw), and two window mount ac units in the summer (which didn't work so wonderfully). It was time for a change. Also, the double paned windows all along the front of our home had clouded up and looked horrible, not to mention that I couldn't see through them.
So, we got a new steel roof, pained the house, put windows across the front of the house, a new electric heater/AC, AND put in a wood stove! We still have to put up new rails around the porch. and frame the door... oh, I didn't mention, we put a new sliding glass door in!

I LOVE my wood stove!
The rest is great, but I really LOVE my wood stove!
The stove was a rodeo. We had to send parts back and forth a few times before we finally got it all together, but it all worked out. I would like to build a mantle behind it, but that is down the road a bit.

Tomorrow: Fall Harvest!